


Accessories for little boys are limited, and after three boys, I am feeling the need to accessorize. Pair that with the fact that he's constantly dribbling down his chin, and this is a perfectly satisfying quick sew.

You've probably seen bandana dribble bibs before, but I happen to think mine are the cutest (yep, I said it). These little bandanas cowl at the neck, and have a fun closure that looks like it's tied. So adorable. No matter which way the bandana shifts, it still looks cute.
Want to make some? I've got a tutorial and free pattern for you today! Don't want to make your own? I just listed a second set of baby bandana bibs in my etsy shop, get them while you can.
Materials
1/3 yard exterior fabric (I used a soft cotton flannel from Riley Blake's Sasparilla line)
1/3 yard lining (I used a sweatshirt fleece, but a knit, terry cloth, or flannel would all work)
Coordinating thread
Seam Ripper
Iron
Button Hole presser foot (optional)
Printable Bandana bib pattern (Personal/Non-commercial use only)
Cut out your pattern pieces, and tape together matching up triangles.
Fold your fabric in half, and align the pattern with the fold to cut out your bandana pieces. Repeat with lining fabric.
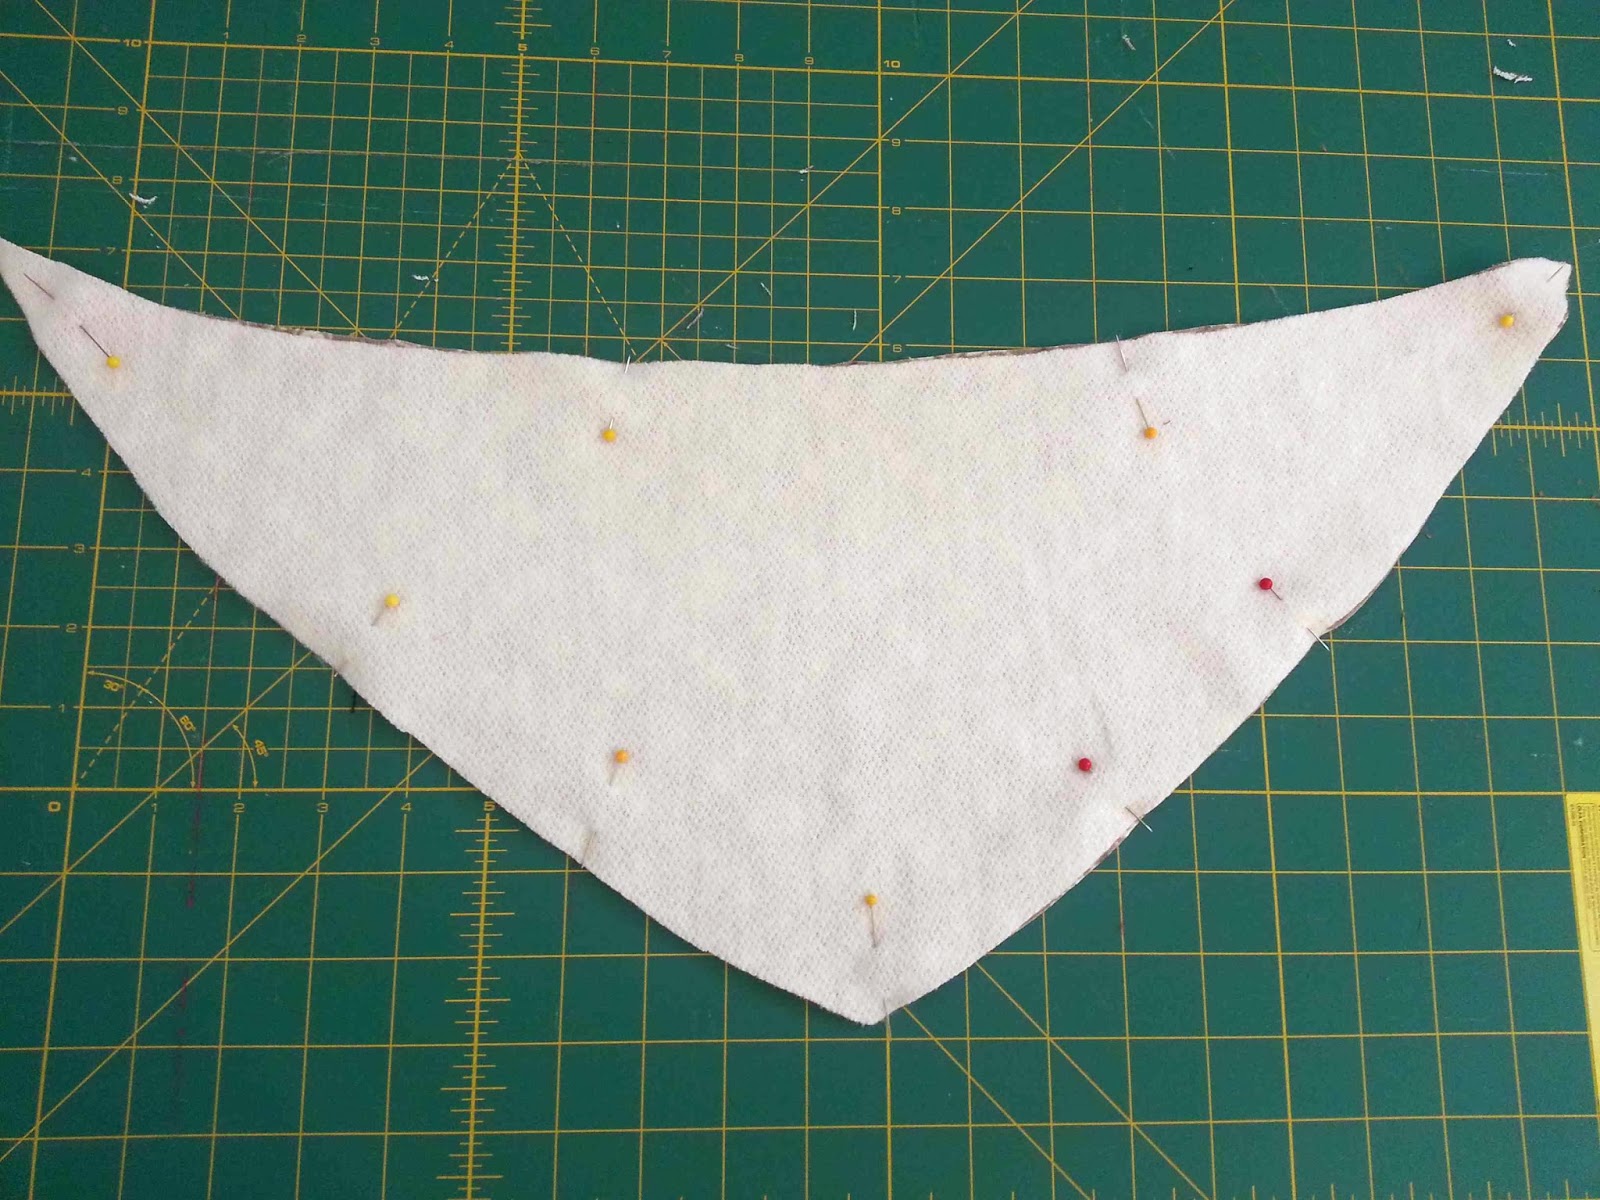
Place your exterior and lining pieces right sides together, and pin in place. Mark the area to be left open (see pattern) with a marking pencil, or different colored pins.

Sew around your bandana, starting and stopping your seams according to the pattern markings. The pattern allows for 3/8" seam allowance. You should be left with an un-sewn area for turning your bandana right side out.
Clip the three corners of your bandana, making sure not to clip through your seam line. This will reduce the seam allowance bulk, and make for sharper points on the finished bandana.

Reach into the un-sewn portion of the bandana, and pull the material right side out. Make sure that your points are nice and sharp at the corners.

Press with a hot iron, making sure that the open edges of the bandana are turned inward.

Topstitch around your bandana, 1/4" from the edge. This should secure your un-sewn area.

On one tie end of the bandana, fold the tie in half. Measure four inches from the tip of the tie and mark.

Adjust your button holing foot to allow for a 5/8" button. Attach the button hole foot to your machine, and adjust machine settings. (Read more about sewing button holes)

Line up your button hole foot with the 4" mark, sew your button hole.

Ah, a thing of beauty.

Use your seam ripper to open up the button hole.

Your finished bandana should look like this. The tie end opposite the button hole will be pulled through the button hole to secure the bandana.

So cute, right? If you're button hole is too large, the tie could slip too far, and make the bandana too tight.

Tie around your favorite little cow poke, and catch those rascally dribbles. They'll keep your dear ones dry, and make them absolutely irresistible.
Buy your own set of red and grey bandana bibs in my etsy shop (SOLD OUT). Check out my Dribble Bib-danas for sale in my Etsy shop!
27 comments:
Those are really cute! Thanks for sharing your pattern. =)
Awesome little bibs! I've linked to your tutorial on Craft Gossip:
http://sewing.craftgossip.com/free-pattern-baby-bandana-dribble-bibs/2014/02/08/
--Anne
I love it!!! Going to make some for my Grandson. He's 5 mo. old and dribbling all the time. :) Thank you for sharing!
oppss..wanted to say I found your wonderful blog through Craft Gossip.
great tutorial, thank you!
What a great tutorial. I really like your stitching, as well as the button hole to put to the otherside through :) Thank you for sharing.
You are right...yours are the cutest! I just finished making one and love it! Thank you sew much for the great pattern and tutorial...I can't wait to see everyone ooh and ahh at the baby shower this weekend. It went together so quickly that I plan to give a whole bundle of them. Sew nice of you to share, thank you again!
~ Colleen
These baby bibs are the most cutest Bandana bibs ever! The dearest baby boys will surely love this one. And probably, this is the reason why Bandana bibs have been admired by most mothers. It's undeniable that they are so awesome.
Thank you for sharing, I changed a bit the pattern, I thought it was to big formy 4 month's son... Thank you!!
Thanks for sharing your pattern and tutorial, I am excited about making Eeyore bibs for our 4 th grandchild due in November.
Thanks again.
Kay
Thank you so much! Love the pattern, just made a bunch for my little girl. I especially like the anti-choke button hole idea.
Thanks again
Sady
Thank you! I'm a beginner but followed this easily.
I so am appreciative of this pattern. I've given several as gifts, but one mom said her little one could pull his off. Has others had this problem? If so, how can I correct it? Would making the button hole smaller help?
Those are really cute bibs! I agree how limited the accessories are for baby boys, and it’s nice to know that you’ve got ways to create cute stuff for your kids. Thanks for sharing the process with us, by the way. Now, you readers can also make their very own bandanna bibs for their baby boys. Hopefully those cute bandana bibs become a trend! Have a great day!
Dana Sullivan @ VANCHI
Great bib tutorial. I prefer the snap buttons as closure, it is much easier to put and doesn't get pulled off easily. What do you think, could it work?
http://ghcbibs.com
Love the bibs, but I am confused about the PDF file. What is the 2 of 3 pattern? I'm sorry for being so dense, but I can't figure out what to do with it.
Loved the tutorial. Thanks for sharing. My boys and newphews will be decked out soon!! Thanks again Leisa
There is a problem with the last page of the pattern. Its not there to print out. It looks gorgeous and I can't wait to be able to make it thanks!
Wendy :)
Thanks for letting me know Wendy B, I will look into it, and email you the pattern in the mean time.
Not to sound like a broken record, but page three appears to still have an issue.
These are precious! Thanks for sharing. I would like to make some but I am not able to open the pattern. I just get bumped out of Pinterest when I click on your links. Any help would be greatly appreciated. Thanks!
I am not sure what problems there are in loading the pattern. All three pages load on my computer. I will try to figure this thing out for everyone.
Love the idea of nit having the bib securely fastened! So much safer! Thanks for your cute cute!!!
You said he had constipation too, so that's probably it right there. He needs help going poopy. Talk with your pediatrician about which method would be best to ease his constipation. There are lots of treatments out there.
baby drool bibs
I just want to thank you for sharing your information and your site or blog this is simple but nice Information I’ve ever seen i like it i learn something today. Baby drool bibs
The fabric design of your baby-dribble is good.Your fabric design your better.To get more design in weaveron textile click on this link....:https://www.weaveron.com
Post a Comment